Informieren Sie sich über ausgewählte Unternehmen im Anbieterverzeichnis von SELFPHP
:: SELFPHP Forum ::
Fragen rund um die Themen PHP?
In über
130.000 Beiträgen finden Sie sicher die passende
Antwort!
:: Newsletter ::
Abonnieren Sie hier den kostenlosen
SELFPHP Newsletter!
Working with Components
What you’ll learn in this module:
The purpose of Components
How to convert an object to a Component
Adding components to Navigation screens
Prototyping with SketchFlow: Module 5
Working with Components
In this module, you will discover how components in SketchFlow allow you to add reusable content to your prototypes. Components will save you time, and help you to maintain consistency throughout your project.
An Overview of Components
Components are a SketchFlow feature that allows you to create objects that can be reused in your SketchFlow project. Components are very flexible; examples might include a navigation bar, a form, a chat window, etc. Any object that is modular and might be reused on multiple pages is a candidate for a Component.
Opening an Existing Project
To get started, you will open an existing project.
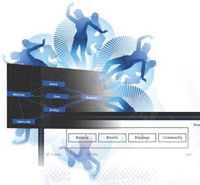
1 With Expression Blend 3 open choose File > Open Project/Solution and browse to the module05_guide folder. Open the folder and then open the snowboard_online folder contained within.
Click on the Expression Blend file named snowboard_online and double-click to open it in Expression Blend 3.
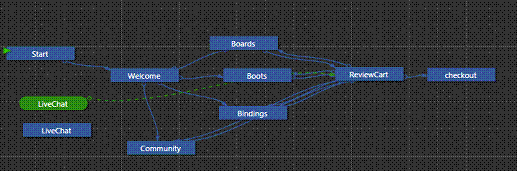
In the SketchFlow Map panel, double-click on the Welcome screen if it is not currently open.
Creating Connections
You can create connections between Component Screens and Navigation screens. This allows you to add the contents of the Component screen to any given Navigation screen. One key difference between Component and Navigation screens is that components do not have incoming navigation connections.
On the Welcome screen open the Objects and Timeline panel, then locate the object [Image]bg_Welcome. Click on the empty circle underneath the Padlock column to lock this image. This prevents you from accidentally moving the image.
Select the navbar and the buttons by drawing a marquee over the group with the Selection tool. Now, right-click anywhere inside the navbar and choose Make Into Component Screen.
In the resulting screen, type navbar into the Name field and press OK.
You now have an independent Component screen labeled navbar that is its own file. Within the SketchFlow Map notice that there is a green node labeled navbar and it is linked to the Welcome screen.
The new navbar component.
Click and drag the new navbar component below and to the right of the Community Screen. You will now apply this component to the Boards, Boots, Bindings and Community page.
In the SketchFlow Map panel double-click on the Boards page to open it. You will see the component on your screen, however you will have to reposition it. Additionally, you may see an exclamation point and an orange border around the component. This signifies that you need to rebuild your application in order to make SketchFlow aware that you are using this new component.
Press Project > Rebuild Project and the exclamation point disappears. You will now have to rearrange the pre-existing text blocks on the page.
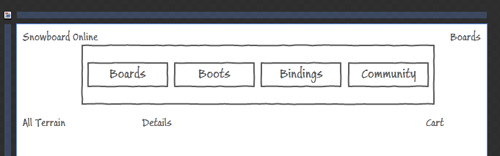
Move the navbar away so that you can see the text below and then Shift-click to select all three items: All Terrain, Details, and Cart. When these three items are selected, drag them further down on the page.
Reposition the Navbar above the All Terrain, Details and Cart text.
Reposition the navbar about your text.
Double-click the three other pages: Boots, Bindings and Community and position the navbar and any other elements that may be in the way.